找到
78
篇与
文笔记录
相关的结果
- 第 15 页
-
 牛奶咖啡相关代码 牛奶咖啡相关代码 前言 记录编写牛奶咖啡软件的相关代码,方便后续自己修改更新改进 相关代码 {collapse-item label="游戏更新标识" close} 说明:获取游戏更新内容的标识,以达到自动发布游戏更新内容,代码如下: private async void 更新标识() { string url = "http://rc.leeuu.com/data/js/rcdef01.js";//浪漫庄园更新地址 using HttpClient client = new HttpClient(); string pagecontent = await client.GetStringAsync(url); string pattern = @"news,(.*?),"; Match match = Regex.Match(pagecontent, pattern); if (match.Success) { string extractedContent = match.Groups[1].Value; Console.WriteLine(extractedContent); string url_更新内容 = "http://rc.leeuu.com/data/news/" + extractedContent + ".htm"; using HttpClient client1 = new HttpClient(); string pagecontent1 = await client1.GetStringAsync(url_更新内容); HtmlAgilityPack.HtmlDocument doc = new HtmlAgilityPack.HtmlDocument(); doc.LoadHtml(pagecontent1); HtmlNode 内容 = doc.DocumentNode.SelectSingleNode("//div[@id='right']");//获取更新内容的相关信息 if (内容 != null) { Console.WriteLine(内容.InnerHtml); string 正文 = 内容.InnerHtml; //去掉p标签,去掉</strong>标签 正文 = 正文.Replace("<p>", "").Replace("</p>", "").Replace("<strong>", "").Replace("</strong>", "").Replace("<h3>", "").Replace("</h3>", "").Replace("<p style=\"text-align: right;\">", "").Replace(" ", "").Replace("</span>", "").Replace("<span style=\"text-indent: 2em;\">", "").Replace("<br>", "").Replace("<div id=\"qb-sougou-search\" style=\"display: none; opacity: 0;\">\r\n搜索\r\n<p class=\"last-btn\">复制\r\n<iframe src=\"\"></iframe></div>", "").Replace("<span style=\"color: rgb(255, 0, 255);\">", "");//去除无关内容 textBox_首页.Text = 正文; } else { Console.WriteLine("没找到相关内容"); } } else { Console.WriteLine("未找到匹配内容"); } }{/collapse-item} {collapse-item label="获取服务器更新说明" close} 说明:读取服务器内的文本文件获取其中内容,并将获取到的内容显示在指定位置,代码如下: private async Task 历史更新() { string 历史更新_url = "........";//将""中的内容替换为你自己的文本文档地址 try { WebClient client = new WebClient(); string content = client.DownloadString(历史更新_url); // 将换行符替换为TextBox能识别的换行格式 content = content.Replace("\n", "\r\n"); textBox_历史更新.Text = content; } catch (Exception ex) { MessageBox.Show("读取文件出错: " + ex.Message); } }{/collapse-item} {collapse-item label="读取内容到下拉框中" close} 说明:读取服务器中的内容到下拉框中,代码如下: if (comboBox_功能选择.SelectedIndex == 0) { string 搜物_url = ".....";//替换为你的文档位置 try { WebClient client = new WebClient(); string content = client.DownloadString(搜物_url); string[] lines = content.Split(new string[] { "\r\n", "\n" }, StringSplitOptions.RemoveEmptyEntries); comboBox_查询.Items.Clear(); foreach (string line in lines) { comboBox_查询.Items.Add(line); } } catch (Exception ex) { MessageBox.Show("读取文件出错: " + ex.Message); } }其它的内容类似 {/collapse-item} {collapse-item label="钉钉发送信息函数" close} 说明:钉钉发送信息函数,代码如下: public static class DingDingNotifier { private const string WebhookUrl = "......";//替换为钉钉群内机器人的链接 public static async Task SendMessage(string message) { var client = new HttpClient(); // 使用 markdown 格式并包含 @all var jsonContent = new { msgtype = "markdown", markdown = new { title = "公告", text = $"#### 公告\n{message}\n\n@all" // 注意这里的 @all 标签 }, at = new { atMobiles = new string[] , // 保持为空数组,因为我们使用 @all isAtAll = true // 设置为 true 以 @所有人 } }; var jsonOptions = new JsonSerializerOptions { PropertyNamingPolicy = JsonNamingPolicy.CamelCase }; var content = new StringContent(System.Text.Json.JsonSerializer.Serialize(jsonContent, jsonOptions), Encoding.UTF8, "application/json"); try { HttpResponseMessage response = await client.PostAsync(WebhookUrl, content); if (!response.IsSuccessStatusCode) { Console.WriteLine($"发送消息到钉钉失败。状态码: {response.StatusCode}"); } else { Console.WriteLine("消息发送成功。"); } } catch (Exception ex) { Console.WriteLine($"发送消息到钉钉时出错: {ex.Message}"); } } }{/collapse-item}
-
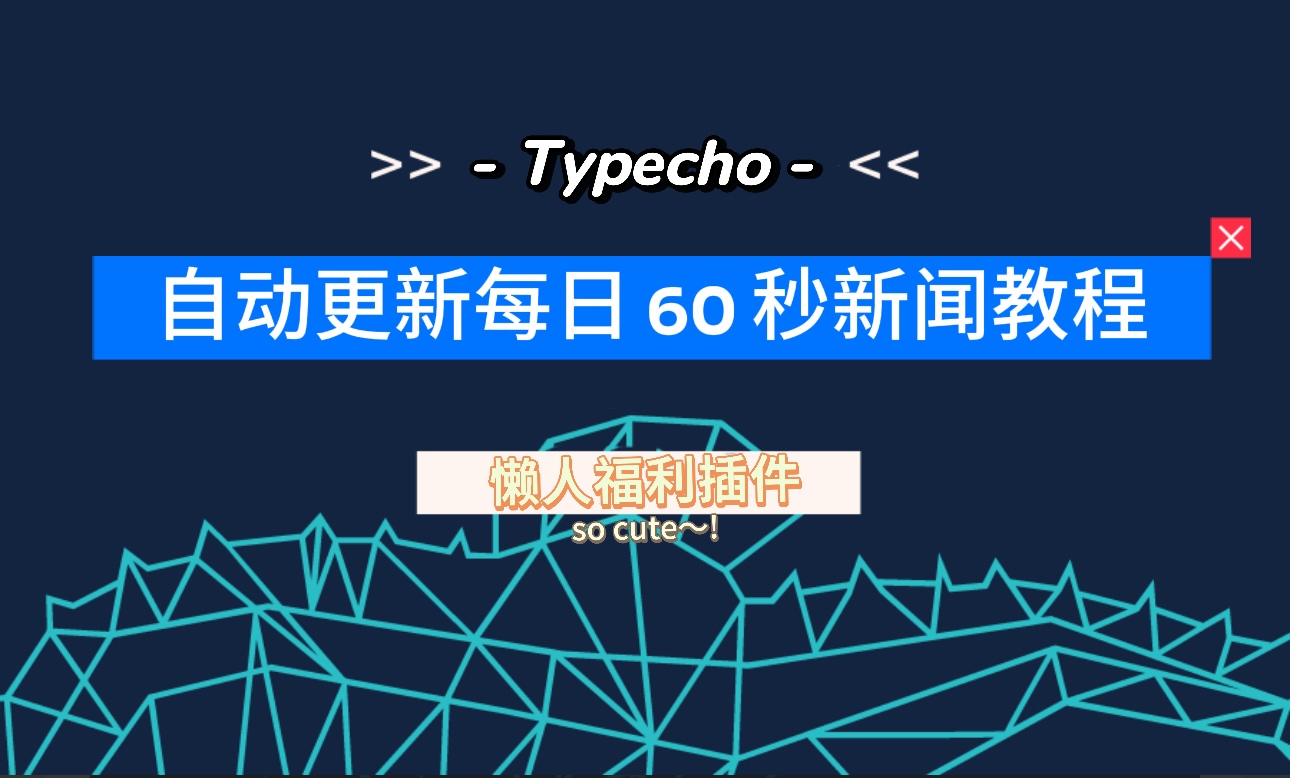
Typecho 定时发布每天60秒读懂世界 新闻60秒图片 使用教程 复制下方代码保存到 typecho 的任意一个目录 推荐创建一个 60s 文件夹然后新建一个 index.php的文件 把代码丢进去 代码里面需要修改的地方我已经给你们标注出来了 添加宝塔定时任务 任务类型:访问url 任务名称:随便设置 执行周期:每天 7 小时 30 分钟 脚本内容:就是你的域名/60s 保存完事 要是 https 协议的用宝塔的 shell 命令代码里面写以下代码 #!/bin/bash # 要访问的 HTTPS 链接 url="你的文件链接" # 使用 curl 访问链接 curl -k $url 相关代码信息 <?php $apiUrl = 'http://api.suxun.site/api/sixs?type=json'; $response = file_get_contents($apiUrl); $data = json_decode($response, true); if ($data['code'] === '200') { $dbHost = '127.0.0.1'; $dbUser = '数据库名'; $dbPass = '数据库密码'; $dbName = '数据库名'; $conn = new mysqli($dbHost, $dbUser, $dbPass, $dbName); if ($conn->connect_error) { die("连接失败: ". $conn->connect_error); } $categoryName = '你需要的分类名称'; $sqlGetCategoryId = "SELECT mid FROM `typecho_metas` WHERE `type`='category' AND `name`='$categoryName'"; $result = $conn->query($sqlGetCategoryId); if ($result && $result->num_rows > 0) { $row = $result->fetch_assoc(); $categoryId = $row['mid']; } else { die("无法找到指定分类的 ID。"); } $sqlGetLastCid = "SELECT MAX(CAST(SUBSTRING(cid, 1) AS UNSIGNED)) AS last_cid FROM `typecho_contents`"; $resultLastCid = $conn->query($sqlGetLastCid); $lastCid = 0; if ($resultLastCid && $resultLastCid->num_rows > 0) { $rowLastCid = $resultLastCid->fetch_assoc(); $lastCid = $rowLastCid['last_cid']? $rowLastCid['last_cid'] + 1 : 1; } $date = date('Y 年 n 月 j 日,l'); $title = $date. ',每日 60 秒读懂世界'; $content = '<img src="'.$data['head_image'].'"><br>'; foreach ($data['news'] as $newsItem) { $content.= $newsItem.'<br>'; } $content.= '<br>'.$data['weiyu']; $tags = '每日 60 秒'; $cid = $lastCid; $slug = date('Ymd'); $sqlInsertPost = "INSERT INTO `typecho_contents` (`cid`, `title`, `slug`, `created`, `modified`, `text`, `order`, `authorId`, `template`, `type`, `status`, `password`, `commentsNum`, `allowComment`, `allowPing`, `allowFeed`, `parent`, `views`, `agree`) VALUES ('$cid', '$title', '$slug', UNIX_TIMESTAMP(), UNIX_TIMESTAMP(), '$content', '0', '1', NULL, 'post', 'publish', NULL, '0', '1', '1', '1', '0', '1', '0')"; if ($conn->query($sqlInsertPost) === TRUE) { $lastInsertId = $conn->insert_id; $sqlInsertRelation = "INSERT INTO `typecho_relationships` (`cid`, `mid`) VALUES ($lastInsertId, $categoryId)"; if ($conn->query($sqlInsertRelation) === TRUE) { echo "文章发布成功!"; } else { echo "Error inserting relationship: ". $conn->error; } } else { echo "Error inserting post: ". $sqlInsertPost. "<br>". $conn->error; } $conn->close(); } else { echo '获取 API 数据失败。'; } ?> 修改上述代码中文标注地方,修改为你自己的信息
-
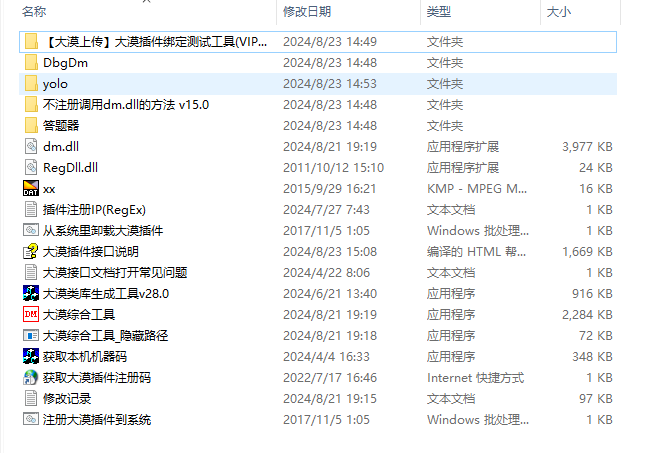
C#免注册调用大漠插件 前言 免注册调用大漠插件,实际上是使用 dmreg.dll 来配合实现,这个文件有 2 个导出接口 SetDllPathW 和 SetDllPathA。 SetDllPathW 对应 unicode,SetDllPathA 对应 ascii 接口。 一、下载大漠插件 下载地址 大漠插件 解压完成后,如下图所示: 大漠插件图片 二、生成大漠类库 打开 大漠类库生成工具 文件夹,如下图所示: 大漠插件图片 打开 大漠类库生成工具 v28.0.exe 文件,如下图所示: 大漠插件图片 将 dm\7.2434\dm.dll 拖到 大漠类库生成工具 里面,如下图所示: 大漠插件图片 类名选择使用自定义类名,指定类名输入 DmSoftCustomClassName(这里只是示例,你可以输入你喜欢的名字,如:abcde、aabbc、abab 等),如下图所示: 大漠插件图片 点击生成按钮,如下图所示: 大漠插件图片 打开 \7.2434\Output\C# 文件夹,可以看到生成的结果,如下图所示: 大漠插件图片 生成的 obj.cs 即是使用在 C# 平台下的类库封装,稍后在 C# 免注册调用大漠插件的示例中会用到。 三、创建控制台应用程序 注意:我这里创建的是 .NET Core 8.0 的窗口应用程序,你也可以创建你喜欢的。 3.1 引入大漠插件 dll 在项目中创建 libs 文件夹,用于放置大漠插件的 dll,如下图所示: 大漠插件图片 dm.dll 在 \7.2434 文件夹下,如下图所示: 大漠插件图片 DmReg.dll 在 免注册\不注册调用dm.dll的方法 v15.0 文件夹下,如下图所示: 大漠插件图片 设置 dll 属性 复制到输出目录 为 始终复制: 在 dm.dll 上单击鼠标右键,选择 属性; 在属性面板中,“复制到输出目录”选项,选择“始终复制”; 在 DmReg.dll 也重复上面的操作。 大漠插件图片 3.2 引入大漠类库 在项目中创建 DmSoft 文件夹,用于放置大漠类库。 将之前生成的大漠类库(obj.cs)复制到项目中的 DmSoft 文件夹,并改名为 DmSoftCustomClassName(可以改名,也可以不改名,还可以改成任意名,你喜欢就好……),如下图所示: 大漠插件图片 3.3 创建 Resources 文件夹 在项目中创建 Resources 文件夹,用于放置大漠插件使用到的资源,比如图片、字库等,如下图所示: 大漠插件图片 3.4 创建大漠插件配置类 在项目中创建 Configs 文件夹,并在 Configs 中创建 DmConfig 类,用于设置大漠插件用到的常量。 DmConfig.cs namespace DmSoftTestConsoleApp.Configs { /// <summary> /// 大漠插件配置 /// </summary> public class DmConfig { /// <summary> /// 大漠插件免注册 DmReg.dll 路径 /// </summary> public const string DmRegDllPath = @"./libs/DmReg.dll"; /// <summary> /// 大漠插件 dm.dll 路径 /// </summary> public const string DmClassDllPath = @"./libs/dm.dll"; /// <summary> /// 大漠插件注册码 /// </summary> public const string DmRegCode = ""; /// <summary> /// 大漠插件版本附加信息 /// </summary> public const string DmVerInfo = ""; /// <summary> /// 大漠插件全局路径,设置了此路径后,所有接口调用中,相关的文件都相对于此路径. 比如图片,字库等. /// </summary> public const string DmGlobalPath = @"./Resources"; } }3.5 创建 C# 免注册调用大漠插件类 namespace DmSoftTestConsoleApp.Configs { /// <summary> /// 大漠插件配置 /// </summary> public class DmConfig { /// <summary> /// 大漠插件免注册 DmReg.dll 路径 /// </summary> public const string DmRegDllPath = @"./libs/DmReg.dll"; /// <summary> /// 大漠插件 dm.dll 路径 /// </summary> public const string DmClassDllPath = @"./libs/dm.dll"; /// <summary> /// 大漠插件注册码 /// </summary> public const string DmRegCode = ""; /// <summary> /// 大漠插件版本附加信息 /// </summary> public const string DmVerInfo = ""; /// <summary> /// 大漠插件全局路径,设置了此路径后,所有接口调用中,相关的文件都相对于此路径. 比如图片,字库等. /// </summary> public const string DmGlobalPath = @"./Resources"; } }在 DmSoft 文件夹创建 RegisterDmSoft 类,用于实现 C# 免注册调用大漠插件。 RegisterDmSoft.cs using System.Runtime.InteropServices; using DmSoftTestConsoleApp.Configs; namespace DmSoftTestConsoleApp.DmSoft { /// <summary> /// 免注册调用大漠插件 /// </summary> public static class RegisterDmSoft { // 不注册调用大漠插件,实际上是使用 dmreg.dll 来配合实现,这个文件有 2 个导出接口 SetDllPathW 和 SetDllPathA。 SetDllPathW 对应 unicode,SetDllPathA 对应 ascii 接口。 [DllImport(DmConfig.DmRegDllPath)] private static extern int SetDllPathA(string path, int mode); /// <summary> /// 免注册调用大漠插件 /// </summary> /// <returns></returns> public static bool RegisterDmSoftDll() { var setDllPathResult = SetDllPathA(DmConfig.DmClassDllPath, 1); if (setDllPathResult == 0) { // 加载 dm.dll 失败 return false; } return true; } } }注意,在 .NET Core 中,无法使用 64 位进程加载 32 位 dll。解决方法是将程序设置为 32 位的。 大漠插件图片 四、测试 4.1 测试 C# 免注册调用大漠插件 在 Program 类中编写测试代码。 Program.cs using System; using DmSoftTestConsoleApp.DmSoft; namespace DmSoftTestConsoleApp { class Program { static void Main(string[] args) { if (Environment.Is64BitProcess) { Console.WriteLine("这是 64 位程序"); Console.WriteLine("按任意键结束程序"); Console.ReadKey(); return; } // 免注册调用大漠插件 var registerDmSoftDllResult = RegisterDmSoft.RegisterDmSoftDll(); Console.WriteLine($"免注册调用大漠插件返回:{registerDmSoftDllResult}"); Console.WriteLine("按任意键结束程序"); Console.ReadKey(); } } }4.2 测试 Capture 方法 修改 Program 类。 Program.cs using System; using System.IO; using DmSoftTestConsoleApp.Configs; using DmSoftTestConsoleApp.DmSoft; namespace DmSoftTestConsoleApp { class Program { static void Main(string[] args) { if (Environment.Is64BitProcess) { Console.WriteLine("这是 64 位程序"); Console.WriteLine("按任意键结束程序"); Console.ReadKey(); return; } // 免注册调用大漠插件 var registerDmSoftDllResult = RegisterDmSoft.RegisterDmSoftDll(); Console.WriteLine($"免注册调用大漠插件返回:{registerDmSoftDllResult}"); if (!registerDmSoftDllResult) { throw new Exception("免注册调用大漠插件失败"); } // 创建对象 DmSoftCustomClassName dmSoft = new DmSoftCustomClassName(); // 收费注册 var regResult = dmSoft.Reg(DmConfig.DmRegCode, DmConfig.DmVerInfo); Console.WriteLine($"收费注册返回:{regResult}"); if (regResult != 1) { throw new Exception("收费注册失败"); } // 判断 Resources 是否存在,不存在就创建 if (!Directory.Exists(DmConfig.DmGlobalPath)) { Directory.CreateDirectory(DmConfig.DmGlobalPath); } // 设置全局路径,设置了此路径后,所有接口调用中,相关的文件都相对于此路径. 比如图片,字库等 dmSoft.SetPath(DmConfig.DmGlobalPath); // 抓取指定区域(x1, y1, x2, y2)的图像,保存为file(24位位图) var captureResult = dmSoft.Capture(0, 0, 2000, 2000, "screen.bmp"); Console.WriteLine($"Capture 返回:{captureResult}"); if (captureResult != 1) { throw new Exception("Capture 失败"); } Console.WriteLine("按任意键结束程序"); Console.ReadKey(); } } }运行程序,dmSoft.Reg() 方法返回 -2(进程没有以管理员方式运行)。 五、在 VS 中设置程序以管理员身份运行 添加应用程序清单文件到项目中(项目 → 右键 → 添加 → 新建项 → 应用程序清单文件),如下图所示: 大漠插件图片 打开 app.manifest 文件,将 requestedExecutionLevel 元素的 level 属性设置为 highestAvailable。 也就是将 <requestedExecutionLevel level="asInvoker" uiAccess="false" />改为 <requestedExecutionLevel level="highestAvailable" uiAccess="false" />按 F5 运行程序,VS 将提示“此任务要求应用程序具有提升的权限。”,点击“使用其他凭据重新启动(R)”,如下图所示: 大漠插件图片 VS 重新启动之后,按 F5 运行程序,screen.bmp 图片保存到 Resources 文件夹中。 六、源码地址 源码地址:https://github.com/astrid9527... 七、总结 本文已经完整地介绍了如何使用 C# 免注册调用大漠插件的方法,解决方案的结构如下图所示: 大漠插件图片 需要注意的地方有如下几点 在 .NET Core 中 LoadLibrary 无法使用 64 位进程加载 32 位 dll。解决方法是将程序设置为 32 位的。 dm.dll 和 DmReg.dll 需要设置为始终复制到输出目录。 注意检查 SetPath(path) 方法中的 path 是否存在,不存在就创建。 在 VS 中设置程序以管理员身份运行。